Customer Booking Process
How it works
Customers pick date, time, and (when enabled) location, room, and staff on the product page, add the appointment to cart, and checkout. The slot is held while the cart is active.
What you need
- Appointable product with Open hours - Availability
- Working WooCommerce checkout
You are ready when
- ✅ A test booking completes and confirmation email arrives (if emails are on)
- ✅ The appointment appears on Appointments → Calendar
Flow: Booking form → Cart → Checkout → My Account → Appointments
Booking form
The form on the appointable product page reflects your product settings (duration, staff, add-ons, and optional location/room when Locations & rooms is on). Available slots appear after you add Open hours in Availability.
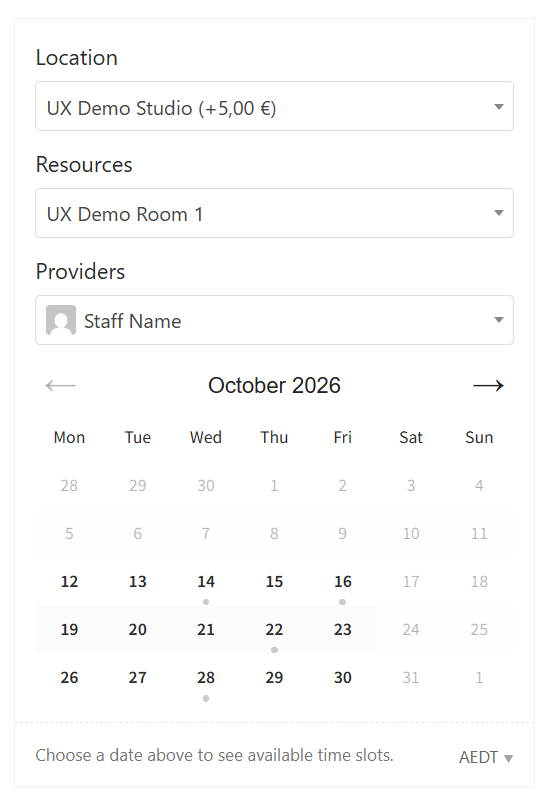
Typical order when the beta is on: Location → resource (room/equipment) → Staff → calendar → time.
- Partially booked days may show a gray indicator on the calendar - optional; hide with custom CSS if you prefer a cleaner look.
- Cost updates as the customer selects options.
- Book Now adds the appointment to the cart when a valid slot is selected.
- In cart status holds the slot for about 1 hour to prevent double-booking.
Selection row (time-based products)
Between the calendar and time slots:
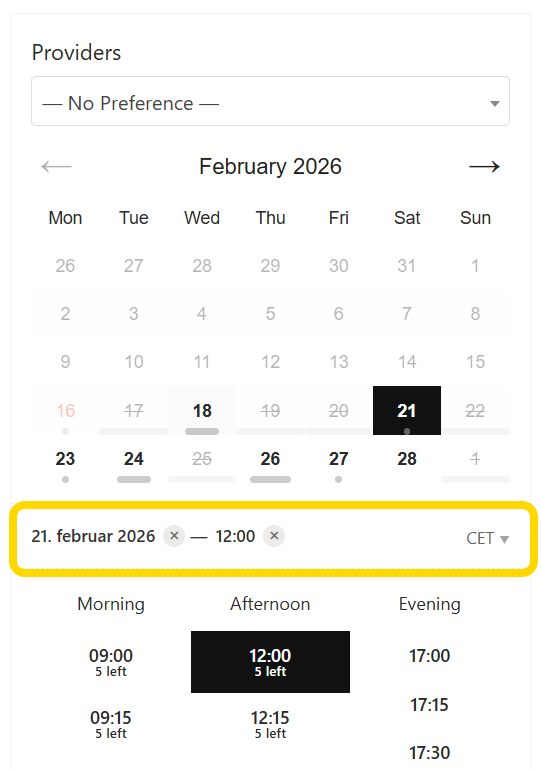
- Selected date and time with clear (×) buttons
- Timezone link on the right (e.g.
EST) when site-wide timezone support is enabled
Recurring packages
When Can be recurring? is on, customers check Repeat this appointment after picking a slot.
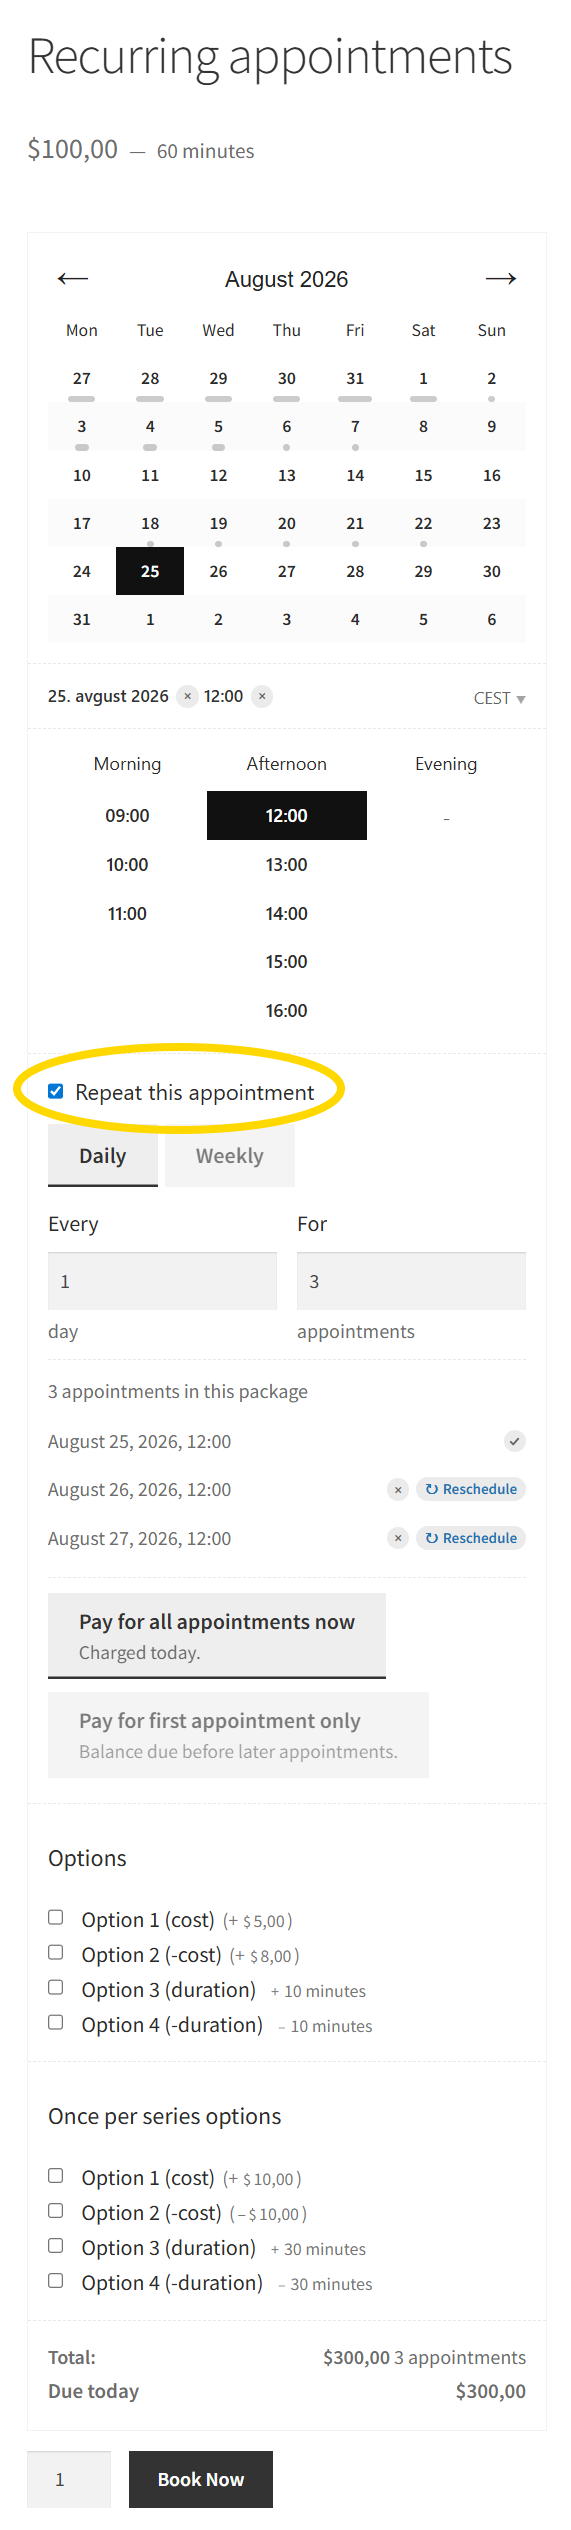
See Recurring packages for prepaid vs pay-first and View series in My Account.
Cart and checkout
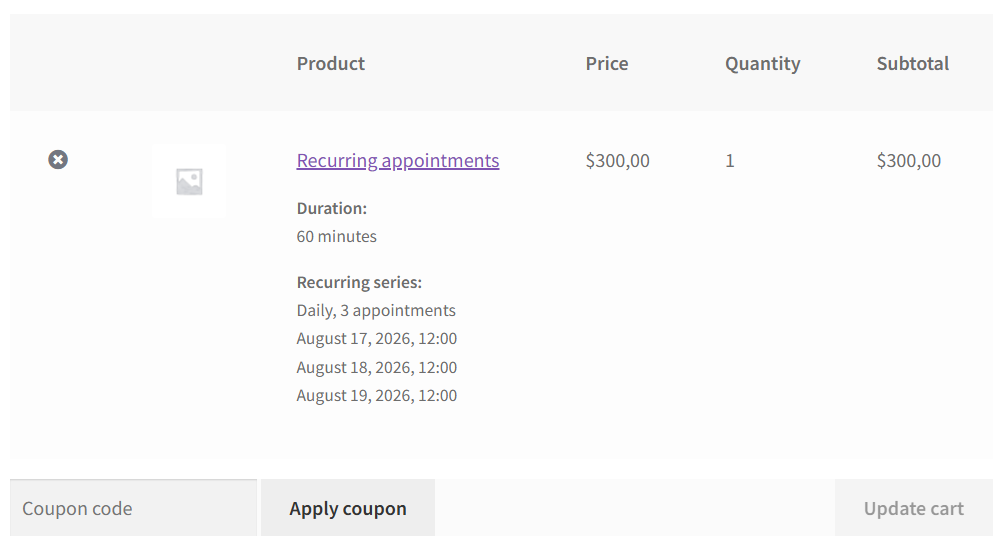
Cart line items show product name, date/time (or package summary), duration, staff, and price.
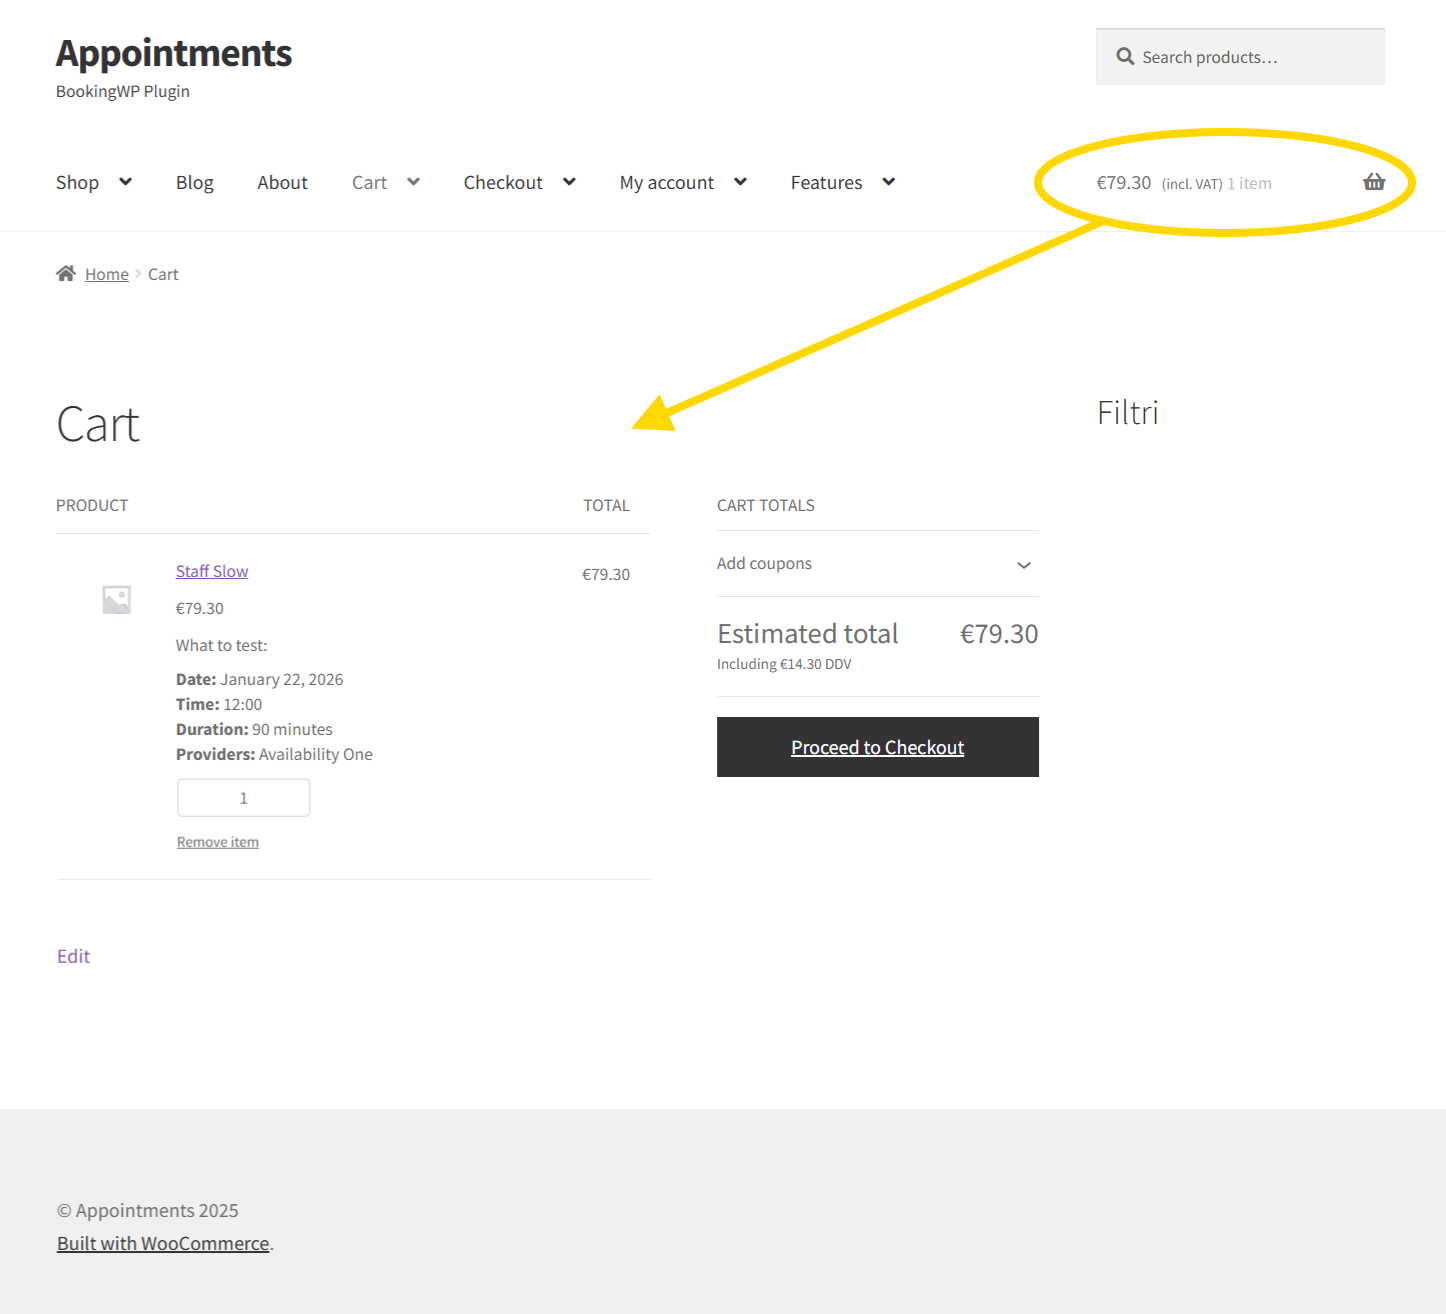
Recurring packages show pattern and session count instead of a single slot:
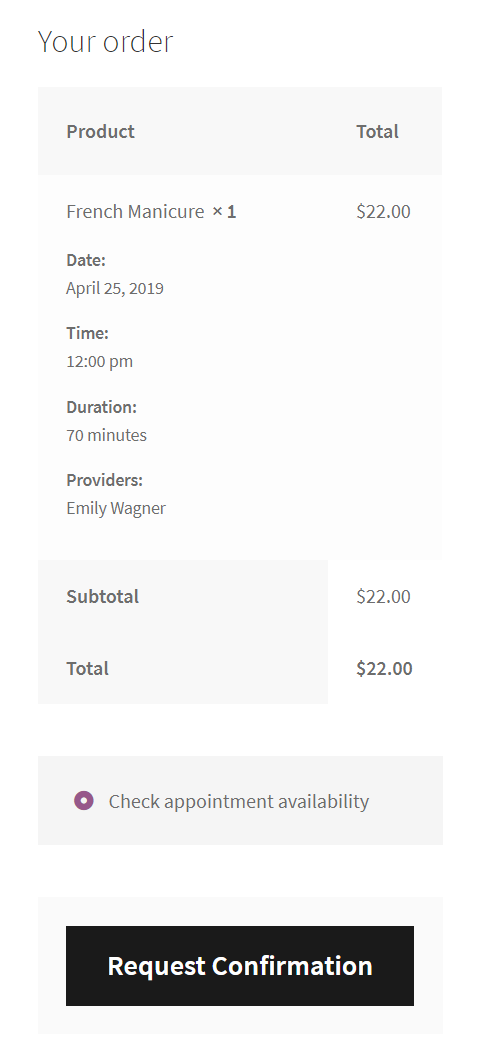
Requires confirmation: no payment at checkout - the customer submits details; you approve, then they pay via email link or My Account.
My Account
Customers manage bookings under My Account → Appointments: view, pay (when pending), reschedule, or cancel per product rules.
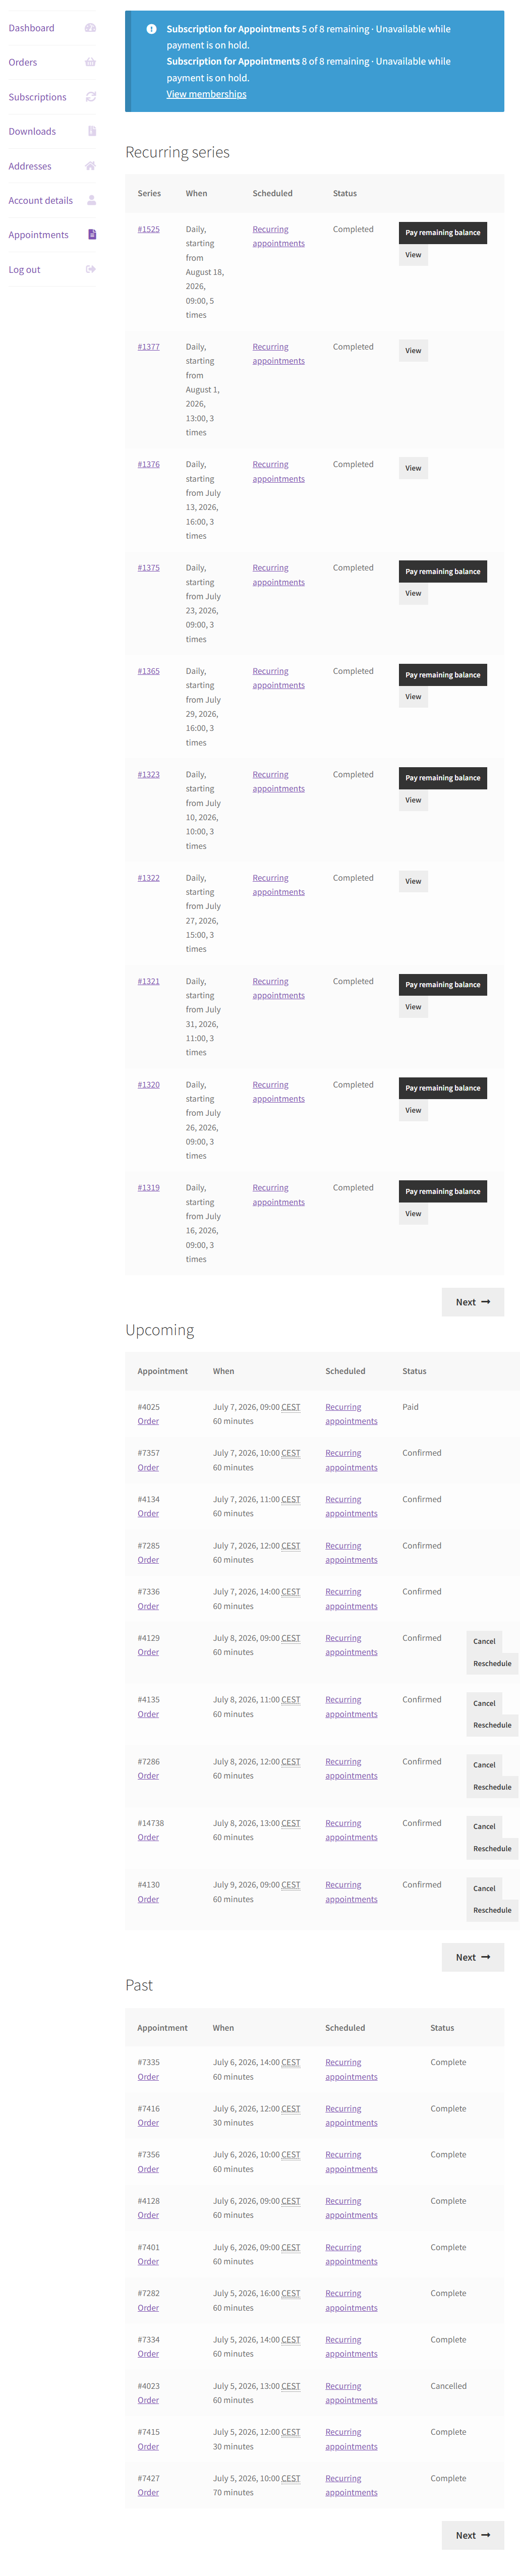
Recurring packages: View series lists sessions, pay remaining balance (pay-first), and scoped cancel/skip/reschedule - Recurring packages - My Account.
Emails
Lifecycle emails (confirmation, reminder, cancel, follow-up) are configured at WooCommerce → Settings → Emails.
See Notifications for each template, ICS attachments, and customization.
Related
- Availability - empty slot picker
- Managing appointments - admin view of the same bookings
- Timezones - customer-facing times