Installation & Setup
How it works
Install the plugin from your BookingWP account, activate your license for updates and support, then configure WooCommerce → Settings → Appointments for site-wide defaults before creating appointable products.
What you need
| Requirement | Minimum | Recommended |
|---|---|---|
| WordPress | 6.8+ | Latest |
| WooCommerce | 10.6+ | Latest |
| PHP | 7.4+ | Latest |
7.4 is the supported minimum (Requires PHP in the plugin header). Hosts on PHP 7.4 still run the plugin; use the latest PHP release your host supports for performance and long-term support.
Important
- WooCommerce must be installed and active before Appointments
- Set WordPress → Settings → General timezone, date, and time format before going live
- See Global Settings after install for availability, Google Calendar, and indexing
:::
Setup order: Install the plugin → Activate the license → Global settings → Create an appointable product
Install the plugin
- Download the plugin ZIP from your BookingWP account.
- In WordPress, go to Plugins → Add New → Upload Plugin.
- Upload the ZIP, click Install Now, then Activate.
Activate the license
- Open My Account → Licenses.
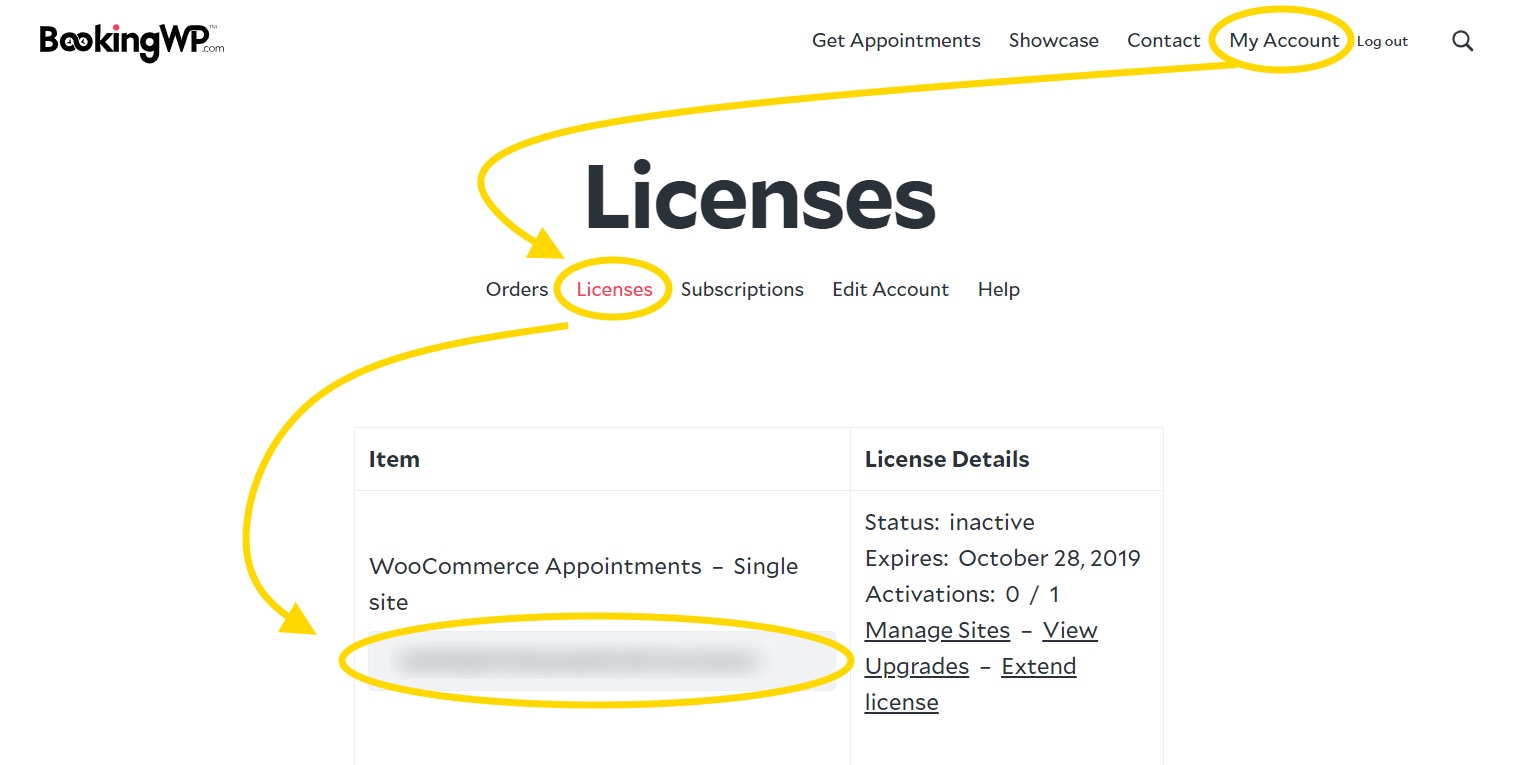
- Enter your license key from your BookingWP account.
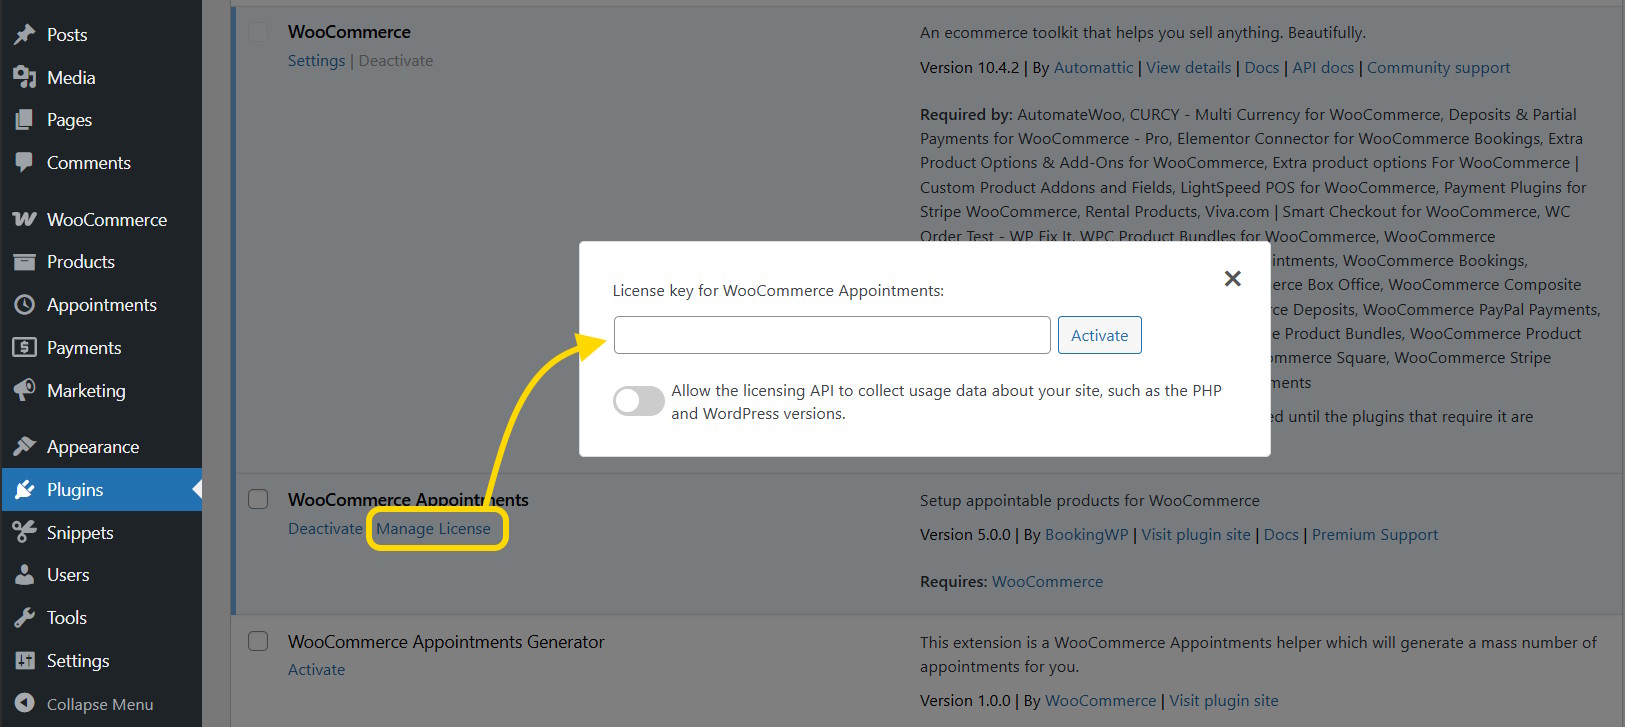
- Click Activate to receive updates and support.
Global settings
Open WooCommerce → Settings → Appointments for site-wide options:
- General - Timezone Display and Experimental (Locations & rooms); hours are edited in Appointments → Availability, not here
- Google Calendar - OAuth and sync
- Indexing & Performance - availability cache
- Staff Permissions - defaults for Shop staff
Store hours: Availability. Full options: Global Settings.
Date & time settings
Date and time settings live in WordPress → Settings → General:
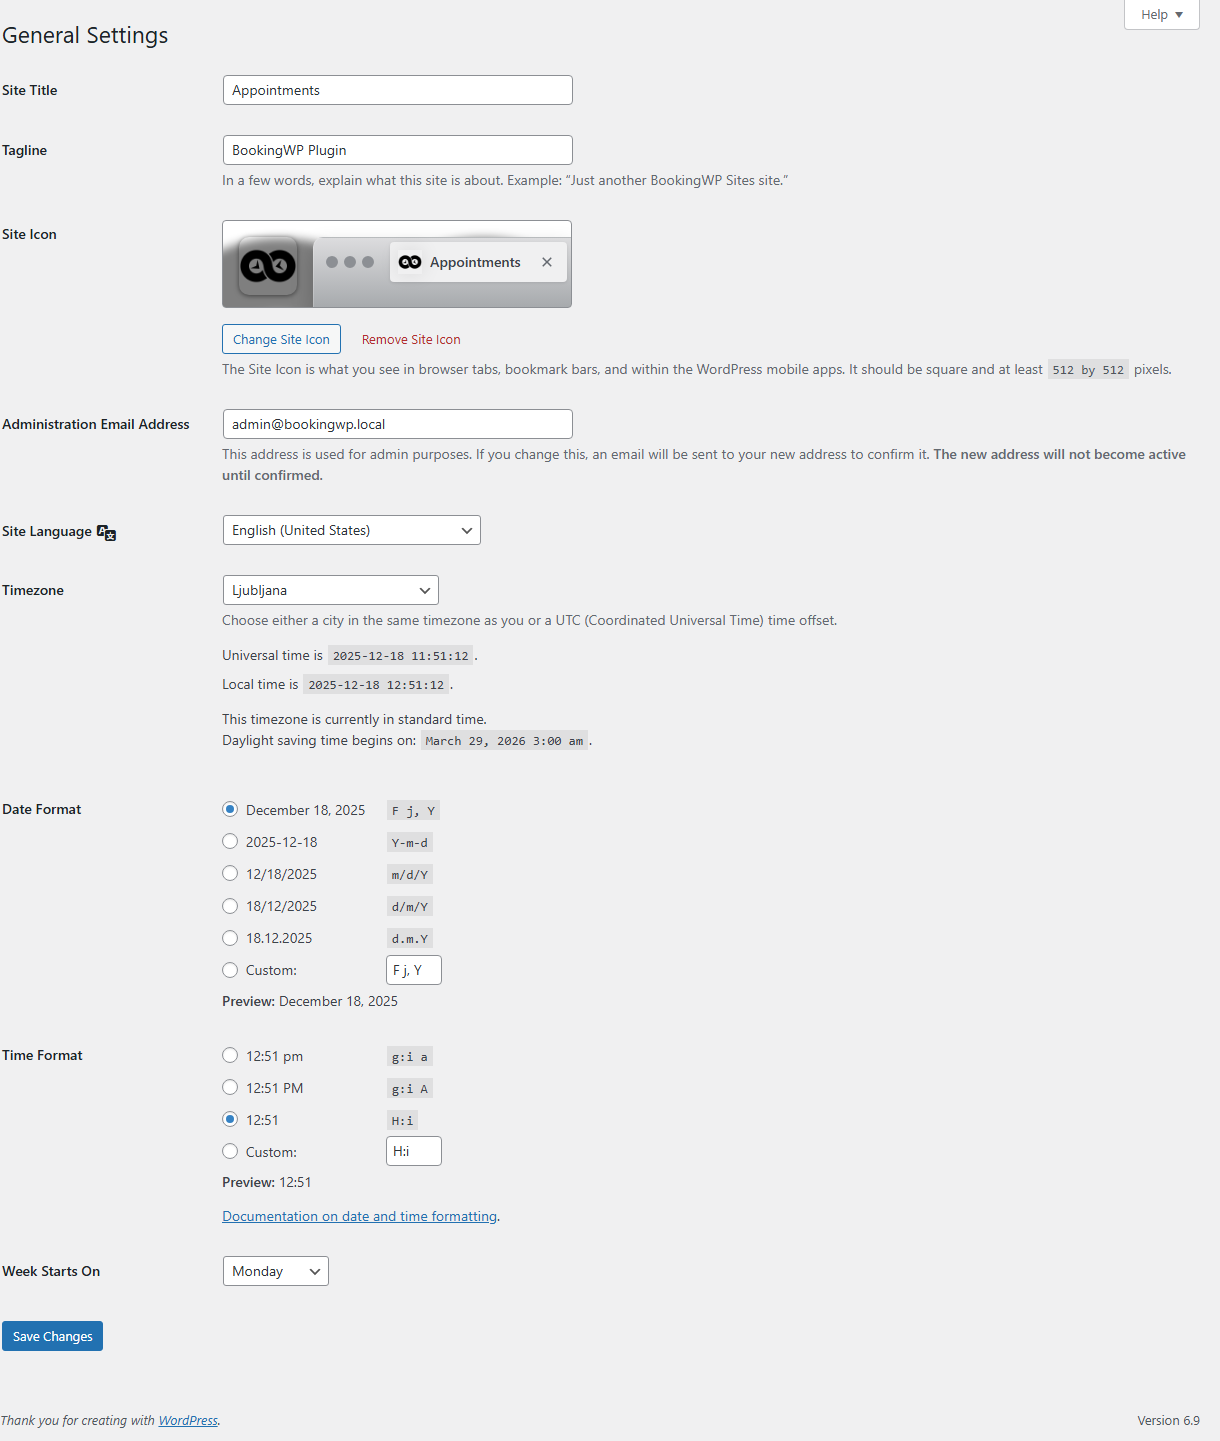
- Timezone: store timezone used for appointment storage and admin views
- Date Format: how dates appear across the site
- Time Format: 12-hour or 24-hour display
- Week Starts On: first day of the week on calendars
Per-product settings override global defaults. See Global Settings for the full options list.
Performance setup
For busy stores, enable Indexing & Performance right after install so availability lookups stay fast.
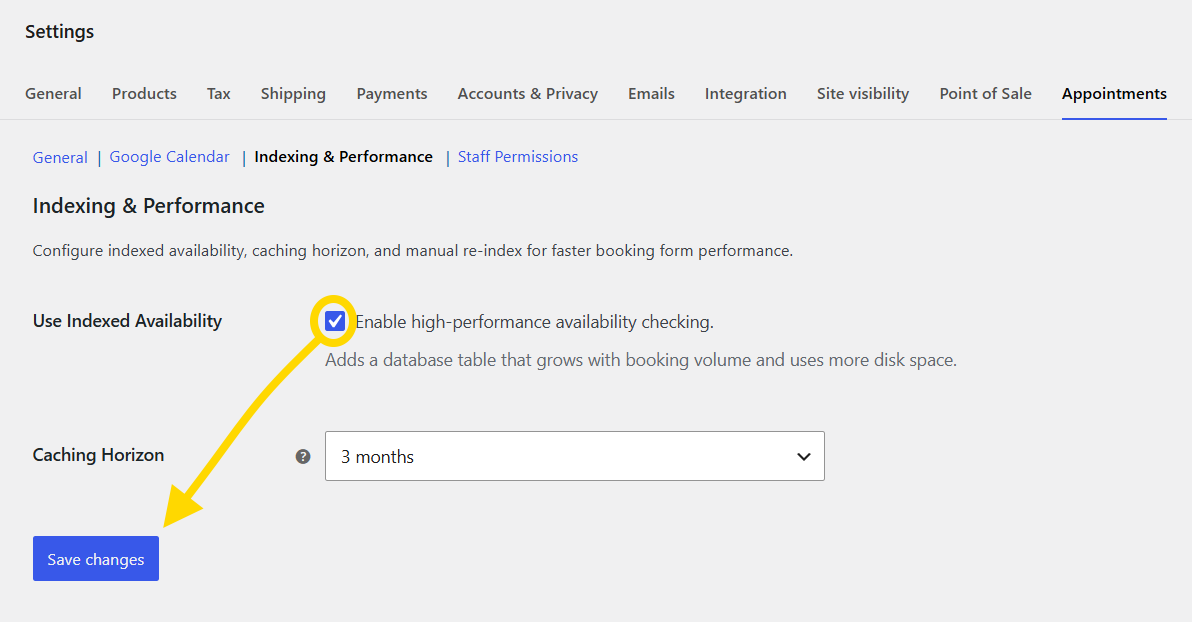
- Go to WooCommerce → Settings → Appointments → Indexing & Performance
- Enable Use Indexed Availability
- Choose a Caching Horizon (months to pre-cache)
- Run a Manual Re-index for existing data if needed
See Indexing & Performance for details.
How it works
WooCommerce Appointments adds a product type called Appointable product. After install, your next step is usually to create one and set duration, staff, and availability.
On the storefront, customers use the booking form on an appointable product page. They can:
- Add the appointment to the cart and pay at checkout.
- Submit an inquiry without payment when Requires confirmation is enabled.
After checkout, WooCommerce creates an appointment record (date, time, customer, staff, add-ons) and links it to the order for payment tracking. You manage appointments under Appointments → Calendar or the appointments list.